A menu in your guests' languages: how to add them, and what to translate first
If your guests come from abroad, some of them are reading your menu through a translation app, guessing what "mas huni" or "hedhikaa" means, or waving for a waiter to explain. A menu page can show each of them their own language from the same printed code. Here's how that works, which languages are worth adding, and what to watch for when you write them.
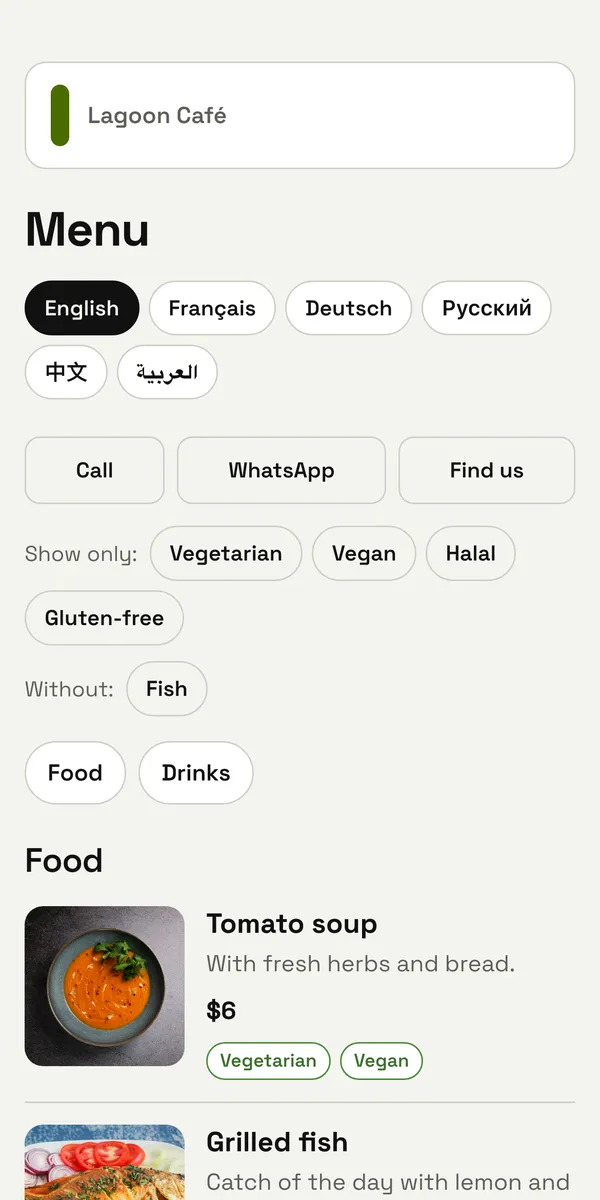
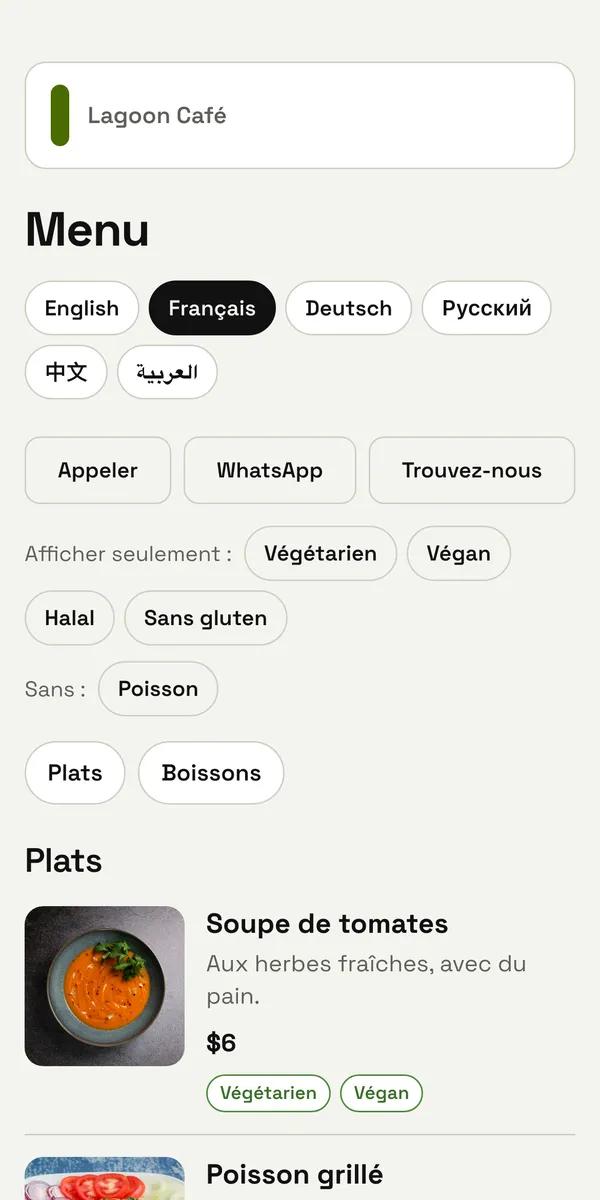
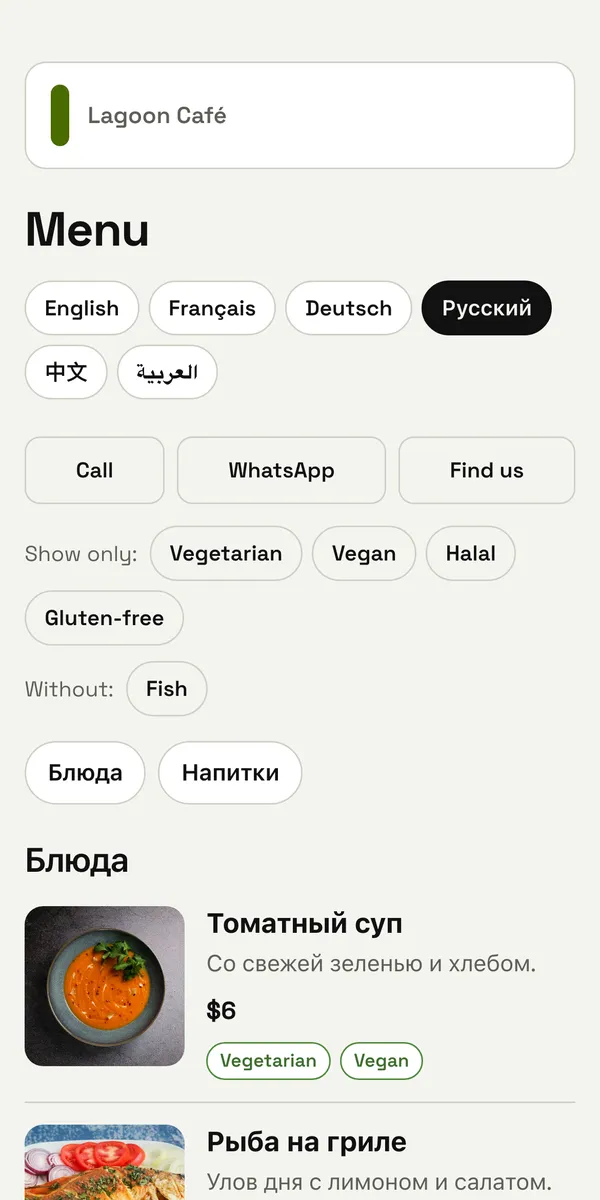
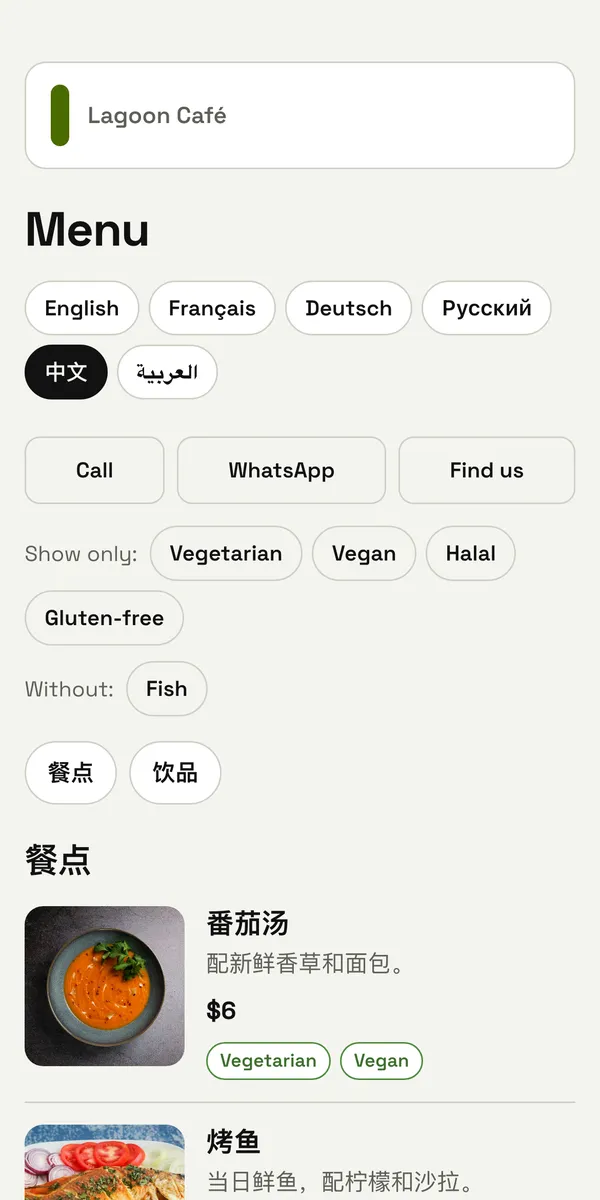
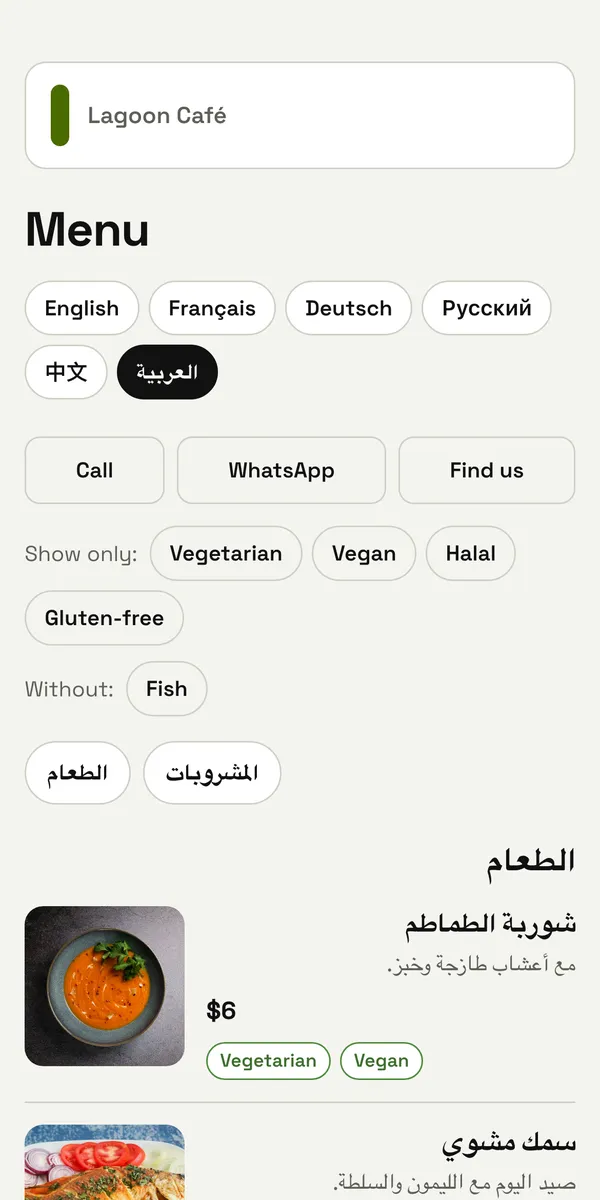
- English
- Français
- Русский
- 中文
- العربية
One printed code. Each phone opens the menu in its own language.
One code for every language
You don't need a French menu, a Chinese menu and a code for each. The menu page has one address and one printed code. When a guest scans it:
- Their phone's language decides. If their phone is set to French and your menu has French, they see French straight away. A phone set to Tagalog gets Filipino.
- Everyone else sees the language you wrote it in. A guest whose language you haven't added gets your main menu, not an error.
- Anyone can switch. The languages are buttons at the top of the page, each written in its own script, so a guest can find theirs even when the rest of the page isn't in it.
You can also share a link that opens in one language, by adding ?l= and the language's code: ?l=fr for French, ?l=zh for Chinese. That's useful on a booking page or a social media post aimed at one country.
Which languages to add
A menu can have up to 5 more languages besides the one it's written in, chosen from 30. Five sounds few, but most places get the bulk of their foreign guests from a handful of countries. To pick them:
- Look at who actually comes. Your booking platform's guest countries, the languages of your reviews, or simply what your staff hear most at the tables.
- Start with the language you get asked to explain in. If the waiters keep translating the menu out loud into Russian, that's your first one.
- Don't add a language nobody will keep up. A half-finished translation with last month's specials missing looks worse than none.
The list includes languages written right to left, like Arabic, Hebrew, Farsi, Urdu and Dhivehi. Their dish names and descriptions run the right way on the page, as in the Arabic phone above.
What gets translated, and what doesn't
It helps to know exactly what changes when the language does:
- You type: section names, dish names and descriptions. Anything you leave empty shows as you first wrote it, so you can start with the names and add descriptions later.
- Stay the same in every language: prices, photos and which labels and allergens a dish has.
- The page's own words, like Call, Show only, Vegetarian, Contains and Sold out today, follow the phone's language when it's one of the site's languages: English, French, German, Spanish, Italian, Dutch, Portuguese and Indonesian. On a phone set to Russian, Chinese or Arabic, the dishes are in that language and these few words stay in English.
- Sizes and extras keep the names you gave them. Write them so they read in any language: 330 ml and 500 ml, or S and L, rather than "small" and "large".
Write translations guests trust
Nothing on a QR Menus page is machine translated: you type every language yourself. That's more work up front, but guests can tell a menu written by someone who speaks the language. Some things that help:
- Ask a native speaker. A member of staff, a regular guest or a friend. Fifteen minutes with someone who speaks the language beats an hour with a dictionary.
- Keep the names of your own dishes. "Mas huni" should stay "mas huni" in every language. Translate the description instead: what's in it and how it's eaten.
- Translate the description more carefully than the name. It's where guests find out about chilli, raw fish or nuts.
- Check the allergens in your main language too. The allergen labels are the same in every language, so they're only as right as the ticks you gave each dish.
- Keep it short. A description of one line reads well in every language. Long ones get longer in German and harder to check in languages you don't read.
Where to type them
In QR Menus, open your menu and go to Contact and languages. Choose the language the menu is written in, add the others, then press Type the texts next to one. Every section and dish is listed with your original above its box, and each text is saved as you leave the box.
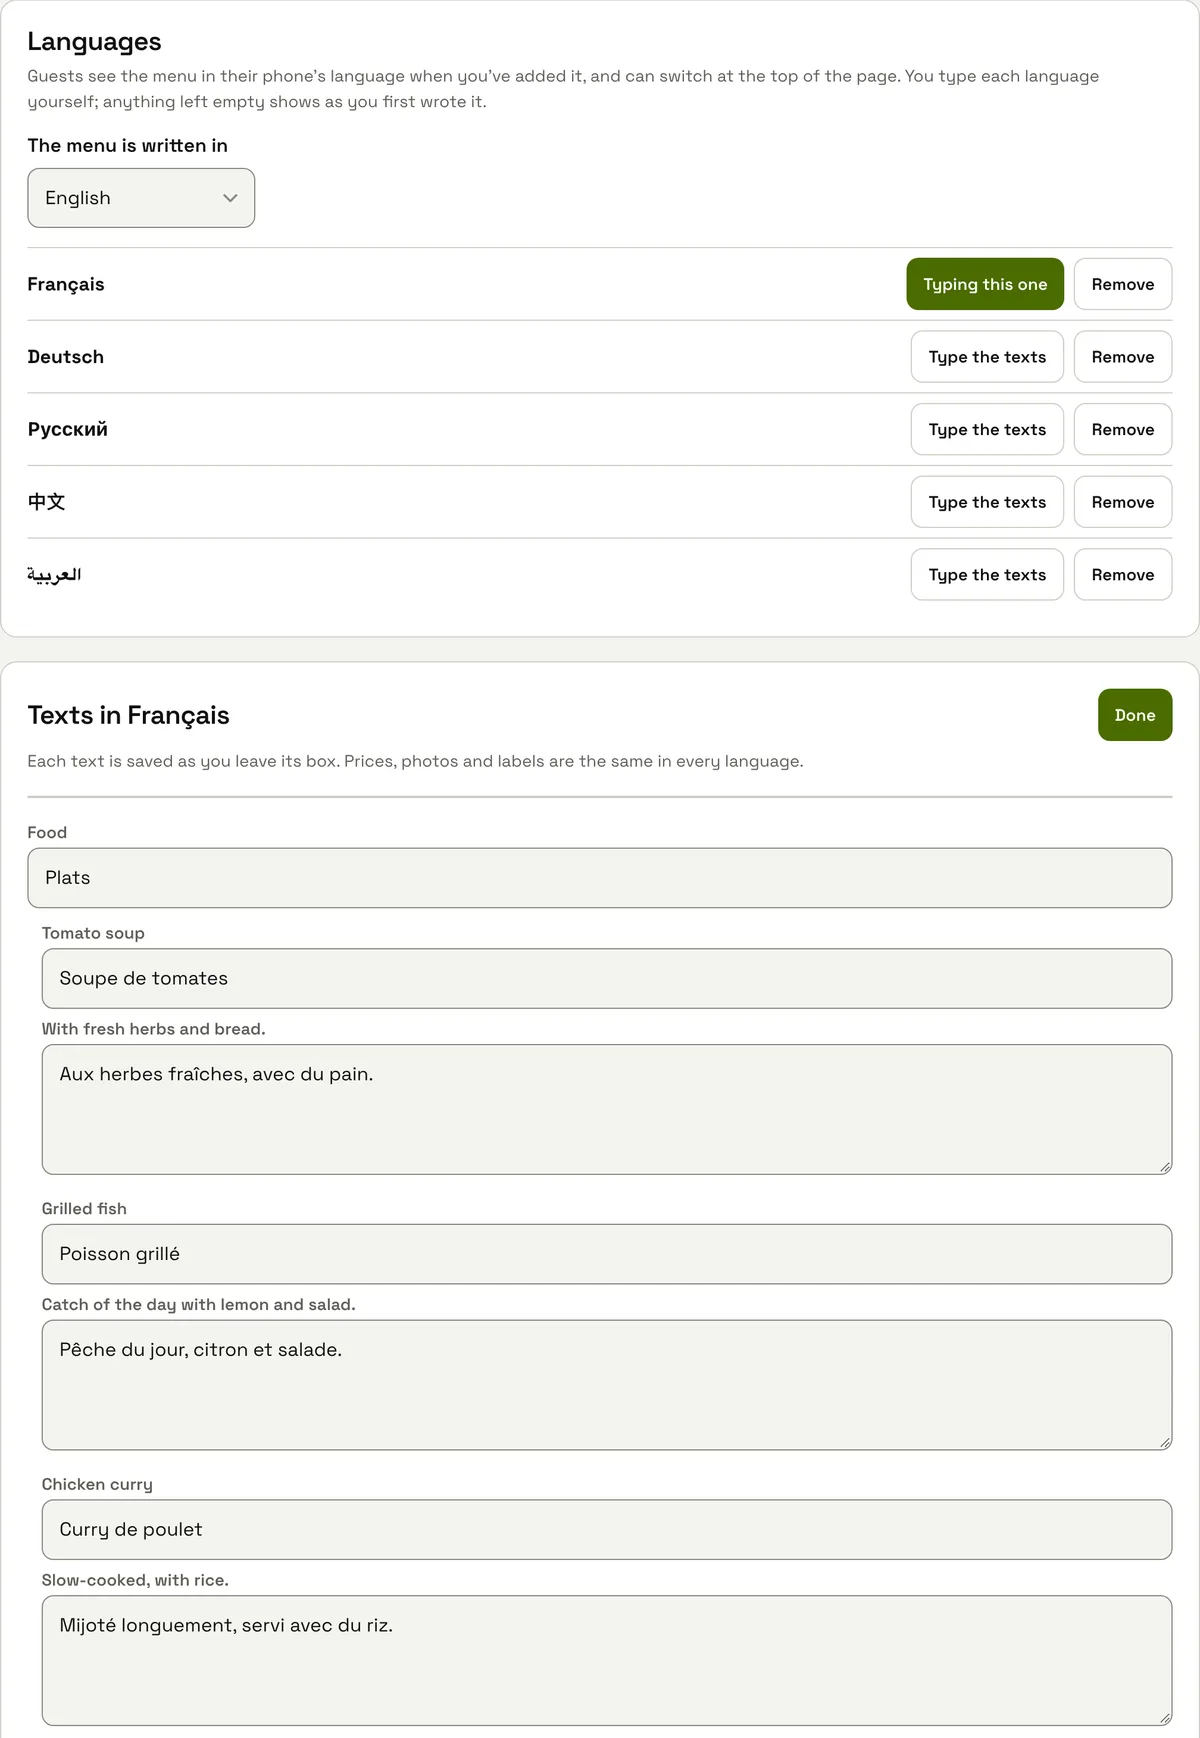
When you change a dish later, remember the other languages: a new dish shows in your main language until you add its translations.
What it costs
QR Menus is free to start: the Free plan includes one small page of up to 30 items, in one look and one language, with a “Menu page by QR Code Spot” line at the bottom. Paid plans, from $4/month billed annually ($5 monthly), take that line off and give up to 300 items, every look, more languages and more pages (Starter 1, Growth 3, Pro 10, Scale 30). There is nothing extra to pay per item or per scan.
More from the blog
Add your guests' languages
Make your menu page and type the languages your guests read.